Monday, July 29, 2013

Cocktailians


A lazy Sunday, after a late night Saturday - bliss.  Spent the whole day catching up on Revenge, a tv show.  Sunday evening was booked for a class at SpeakEasy learning how to make cocktails.

SpeakEasy is a lovely little bar, in Gurgaon which specializes in Cocktails and Mocktails.  We had been here for drinks sometime back and found that it was really special as the crowd is not there to get drunk but to enjoy themselves.  Also its not an overly young crowd.  

On the last Sunday of the month they have a class for approx 2 hours, where they teach you how to make 4 cocktails.  Attended it last evening and it was a pleasure.  Drank quite a bit of what we made so you can imagine how the balance of Sunday evening went.  Thanks a lot to Meenakshi and Shariq Khan.

Some pics below 


Fig Margharita

Fig Margharita

APPLETINI


MOJITO

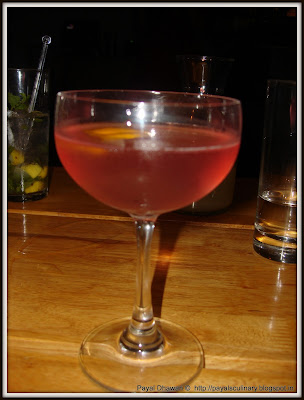
RUM COSMOPOLITAN


MY FAVOURITE - WHISKY SOUR

MANHATTAN


Thursday, July 25, 2013

Dinner with Friends

Its been a few days since I got down to writing anything, what with office being busy, buyers in town, Husband travelling, Mom's birthday whew......

Last week we had some old friends over for dinner - the beauty of spending time with people you have known for a long time is there is no formality.  You can be yourself and let loose.  I had planned a dinner where everything was made in advance and I did not need to spend time in the kitchen while my guests were there.  

We started the evening with appetisers and drinks - lots of drinks :)

There was a cold platter


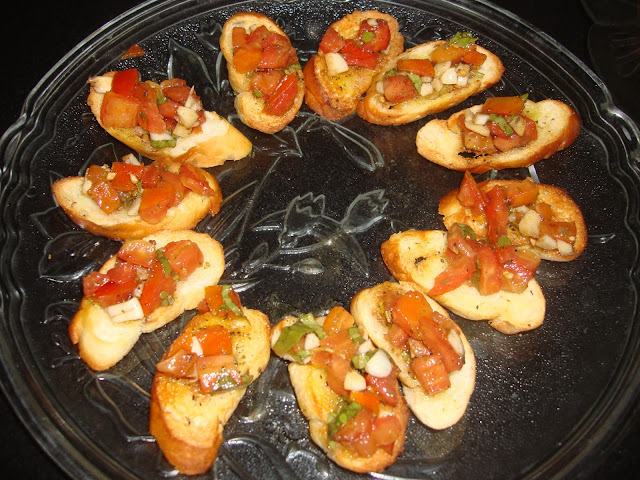
Baby Bruschetta


Chicken Satay with peanut sauce


Pita with Hummus and Babaghanous


Followed by dinner - Chicken Biryani, Mirchi ka Salan, Bhagare Baingan, Keema Pao.  And then Kheer.

Seems like a lot but it really was'nt.  It got wiped out except for the Bhagare Baingan which was a disaster according to me.  


Chicken Satay with Peanut Sauce


Definitely an all time favourite - because its so easy to make and everyone loves it.

Everything that goes into it is normally available at home

Ingredients

  • 200 gms chicken cut into strips
  • Marinade
  • Peanut Sauce
  • Skewers - 12
Marinade
  • 1/2 cup coconut milk
  • 2 tsp brown sugar
  • 1/2 tsp red chilli
  • salt to taste
  • 1/2 tsp light soy sauce
  • 2 tsp ginger garlic paste
  • 1 tsp lemon juice
  • 2 tbsp cornflour
  • 1/2 tsp cumin powder
  • 1/2 tsp coriander powder
Mix all the ingredients for the marinade.  Add in the chicken and keep in a flat dish.  Keep this for at least 2 - 3 hours.  I kept it overnight.  Ensure the dish is covered and kept


Soak the skewers in water, so that when this is made it does not burn.

Thread the chicken on the soaked skewer, put a little oil on a tawa and put skewers on.  Press down flat.  Once the underside is done - slightly browned as the sugar & soya will help it get a nice caramel colour, turn to the other side.  Brown this side also.

Serve with Peanut Sauce
  • 1/4 cup crushed peanuts
  • 1/2 small onion chopped
  • 1 cup coconut milk
  • salt to taste
  • 1/2 tsp corriander powder
  • 1/2 tsp cumin powder
  • 1/2 tsp red chilli powder
  • 1 tsp sugar
  • 1 tsp oil
  • 1 tsp garlic paste
  • 1 1/2 tsp lemon juice
  • 1 tsp light soy sauce


Heat the oil in a heavy bottom frying pan, saute the garlic and onions together.  


Mix in the balance ingredients except the lemon juice and cook on low heat for a couple of mins till blended well. 

Add the lemon juice once removed from heat.  

Temper with a little oil and red chillies


Tuesday, July 16, 2013

Banoffee Pie


This one was made quite some time back and I never got around to posting the recipe or pic. This is a simplified version of the original Banoffee Pie.


The term Banoffee is derived from a combination of Banana and Toffee and is an old English Dessert. The base is normally a shortbread pastry crust. a filling of Dulce de Leche which is a caramalised condensed milk, covered with Sliced Banana and then topped with whipped cream. The Dulce de Leche can be made at home by cooking a can of condensed milk this thick and golden

My version is quicker and easier. Also I like to make small portions as everyone at my home wants a new dessert daily hence this was made in individual pie dishes.

I like to use caramel sauce instead of the Dulce de Leche as its faster to make.  Also I can them make a big batch and keep away to use with brownies, apple pies etc.

The recipe below serves 8 - 10 people so can be scaled down.  

Ingredients

250g digestive biscuits, crushed
100g butter, melted
1 cup Dulce de Leche or 1 cup caramel sauce
4 small bananas
300 ml whipping cream, whipped


Method

Crush the biscuits in a ziplock bag and tip them into a bowl. Add the melted butter and mix well till it clumps. Line an 8" pie dish with the crumbs going up the sides also. Keep in the freezer to set


To make the Dulce De Leche

Empty the condensed milk into an oven-proof dish and tightly cover it with foil.

Make a water bath by placing the covered dish in a larger pan and filling it up with water to the 3/4 level. Bake at 220 C for 1-1.5 hours checking every 30 minutes on the water level and adding more as needed.

Dulce de leche is ready when the condensed milk it takes on a brown caramel-like appearance. Remove from the oven and whisk to smoothness. Let cool before storing.

To make the Caramel Sauce

60 gms sugar
20 ml water
30 gms water
35 gms cream

Place water and sugar in a heavy bottom pan and stir with a spatula over low heat till sugar dissolves
Add butter and stir to combine till butter has melted.
Let mix come to a boil and cook till a golden caramel colour
Remove from heat and add in cream. Mix will foam over. Using a whisk combine well
Return to low heat and cook for 10-15 min till creamy consistancy reached.

Assembling

  • Spread the top of the frozen biscuit base with caramel or Dulce de Leche. 
  • Then layer with sliced bananas
  • Spoon the whipped cream on top covering the bananas.
  • Decorate with grated chocolate or a slice of banana just before serving.

Monday, July 15, 2013

Cinnamon Rolls with Coffee Glaze

Updating new Pictures


This weekend baking was to overcome my fear of using yeast.  Honestly, I avoid all recipes using yeast.  Last week I made the French Bread which came out really well so some of my trepidition reduced.

My Cinnamon rolls were really easy to make.  Fluffy and flavoursome.  I also changed the recipe to using 1/4 wheat flour [atta] instead of just the regular flour.  Fortunately the rising did not get effected and the end result was just as good.

Sunday Breakfast was something to smile about.

The rolls were very simple to put together as it required only 1 rising, unlike other breads which need at least 2.  This helped in cutting down the time by half.  I used a 9" round glass dish to bake them in.  The ingredients were basic flour and I included milk and egg in this to keep the texture light and tender.


The smell of cinnamon is something else.  Problem is I got so carried away that I forgot to take pics.  Next time will take lots and update here.

INGREDIENTS

Buns

  • 2 1/2 cups all purpose flour
  • 1/4 cup whole wheat flour
  • 1 tsp salt
  • 3 tbsp castor sugar
  • 2 1/4 tsp dry active yeast
  • 1/2 cup water
  • 1/4 cup milk
  • 1 egg
  • 2 tbsp butter
Filling
  • 3 tbsp softened butter
  • 1 1/2 tbsp cinnamon powder
  • 1/4 cup brown sugar
Glaze
  • 1 tbsp coffee granules dissolved in 1 tbsp water
  • 1 cup icing sugar 
  • 1 tsp vanilla essence.
METHOD
  1. To make the dough use 2 cups flour + 1/4 cup wheat flour, mix with sugar and salt in a large bowl.
  2. Sprinkle the yeast over the water - water should be 38 C - and leave for 15 mins to bloom - it will double in quantity.
  3. Heat the milk and butter till butter is melted.  The mixture should be at about 54 C. 
  4. Stir the butter mixture and yeast mixture into the flour.  Add the egg and using the dough mixer mix till it all comes together.
  5. Use the reserved 1/2 cup flour if required to make a soft dough.  The dough is ready when it pulls away from the sides and has an elastic consistancy.
  6. On a lightly floured surface knead for 5-6 minutes.  Place this in a greased bowl, cover with clingfilm and keep aside to rest for 10-15 mins.
  7. Once rested, roll out the dough to a 14 x 8 inch rectangle.  Spread the softened butter on this and sprinkle with brown sugar and cinnamon powder.
  8. Roll up the dough, not too tight, into a tube.  It this is too tight the filling will ooze out when dough rises.
  9. Cut into 12-14 rolls and place in a lightly greased round baking dish, against each other.
  10. Cover with a tea towel and keep aside till doubled in side, approx an hour
  11. After the rolls have doubled in size, brush the top with a little milk or cream,  place in a preheated 180 C oven and bake for 20 - 25 min till golden brown on top.  In case you feel the top is getting too brown cover with a foil.
  12. To make the filling, simply combine all the ingredients and pour over the rolls once they come to room temp

Thursday, July 11, 2013

CHERRY JUBILEE CHEESECAKE

Cheesecakes, my weakness.  I keep promising myself to lose weight but can't give up eating these.  What the hell, will walk a little extra :)

I also have a passion for buying books and storing them.  Rummaging through a cupboard I found THE CHEESECAKE BIBLE sitting with my cookbooks.  I immediately knew that I had to make one of these.  Last year I had made the Banana Split Cheesecake and it was yumm.

Note - please collect all the ingredients in advance as they should be at room temp to ensure a good cheesecake.  


CHERRY JUBILEE CHEESECAKE
adapted from The Cheesecake Bible

EQUIPMENT
8" loose bottom tin
Hand Whisk
Spatulas
Weighing scale

CRUST
15 Graham Cracker Biscuits
4-5 tbsp butter

FILLING
1 tin condensed milk
1 pack cream cheese - I used philadelphia
Juice of 2 lemons
4 eggs
1 tbsp cherry liqueur
The Liqueur I found in the bar

TOPPING
1 cup fresh cherries
1/2 cup sugar
1/2 cup water


  1. Put biscuits in a ziplock bag and crush roughly.  Melt the butter and mix into the biscuits.  The mixture should clump together.
  2. Press this mixture into the base of the loose bottom tin and keep in the freezer to set.
  3. Make the topping by combining the cherries, water and sugar and bringing to a boil.  Cook this cherries are soft and water has thickened.  Keep aside to cool
  4. For the filling beat the cream cheese till smooth and creamy.  Add in the condensed milk and lemon juice and mix well
  5. Mix in eggs one at a time - do not overbeat.
  6. Fold in the cherry liquor [optional] and some of the topping mix.
  7. Pour this over the frozen base and bake at 160C for 30 min.  The Centre should jiggle when done.  Leave to come to room temp for at least 2 hours.  The cheesecake will continue to cook.  
  8. Once cooled wrap in cling film and keep in the refrigerator for 6-8 hours for the flavours to mature.
  9. When ready to serve top with some of the cherry jam.


Egyptian Koshary

Saw an interesting pic posted by a fellow member on CAL last week for a dish called Egyptian Koshary.    I worked with Pan American and then Delta Airlines, for 10 years but unfortunately never made it to Egypt, so have had not tasted this.  It looked extremely beautiful and simple to make.


Thanks to Mridul Karkara we had a great dinner.   To get the recipe posted at Mridul's blog click here.  Served this with pan fried aubergines, crisp onion rings and home made French Bread


The only change I made was in using Baharat, an Egyptian spice, to marinate the chicken.  The recipe for Baharat is available here.  Alternatively you could use spice mixes listed here


Baharat Spice